
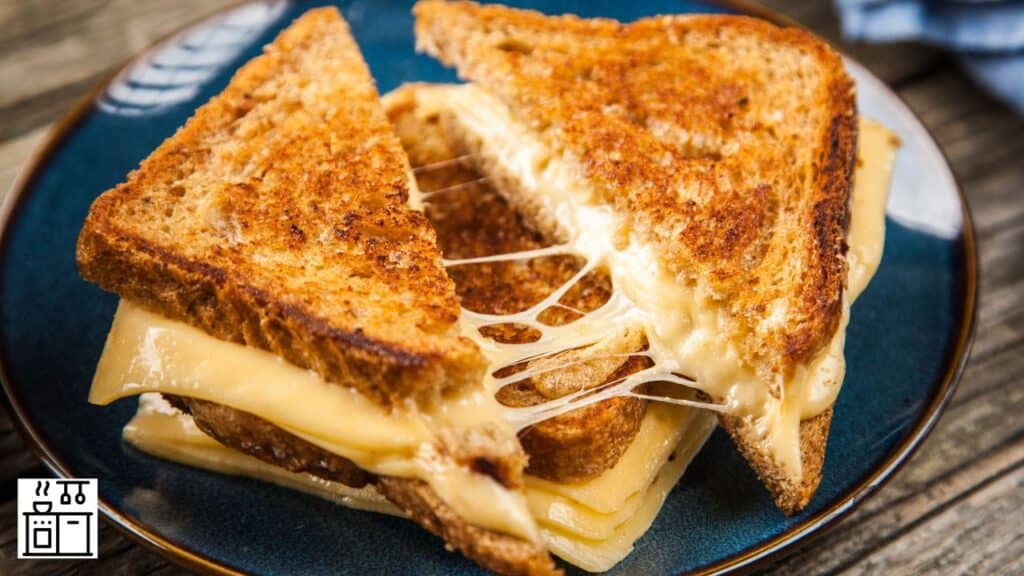
A griddle gives you space to cook grilled cheese sandwiches and turn them as the bread browns. The setting you need depends on the appliance, bread, filling, and method.
Start with instructions that suit your griddle and recipe. A temperature setting alone cannot guarantee evenly toasted bread or melted cheese.
Choosing a Griddle Temperature for Grilled Cheese
There is no single ideal temperature for every grilled cheese sandwich. The Presto 22-inch Electric Griddle manual lists 325–350°F for grilled sandwiches. That is guidance for that model, rather than a replacement rule for every griddle.
Recipes can use different settings and methods. For example, Cuisinart’s Two Cheese Tomato Grilled Cheese recipe uses its Griddler Five in the open griddle position at 425°F. Use the complete recipe with the intended equipment rather than borrowing its setting alone.
A dial setting, a stovetop burner level, and a measured surface temperature are different things. Follow your own manual and recipe, then watch how the bread and filling are cooking.
Steps to Set and Maintain the Griddle Temperature for Grilled Cheese
Use the controls and preheating method provided for your appliance. A single-control electric griddle, a stovetop plate, and a multi-burner gas griddle do not work in exactly the same way.
1. Choose Heat for Your Equipment and Recipe
Use the temperature or burner level specified by a suitable recipe and your appliance instructions. Do not assume that 260–275°F will suit every sandwich or that a low setting eliminates all hot and cold spots.
For cast iron, Lodge recommends gradual preheating to medium heat. That burner guidance is not a measured surface temperature and does not replace the instructions for an electric griddle.
If the bread starts browning before the filling has warmed and melted as intended, reduce the heat as the appliance allows. Give the sandwich time to cook rather than increasing the heat simply to finish sooner.
2. Follow the Preheating Instructions
Preheat for the time or ready signal in your manual. The linked Presto model uses a light that goes out when it reaches the selected setting and cycles during cooking. This does not mean that every point on the surface stays at one exact temperature.
If you want to check surface heat, use an instrument intended for that job. ThermoWorks explains that infrared readings can be misleading on shiny metal and measure the surface, not the inside of food.
Add the sandwich when your chosen method says the surface is ready. Do not assume that every empty griddle keeps getting hotter indefinitely or that every appliance needs the same warm-up time.
Recommended Read: Using Pans On A Griddle | Ideal Burger Griddle Temp
3. Use Cooking Zones Only When Your Griddle Supports Them
A gas griddle with independent burners may let you create different cooking zones. Blackstone describes several burner arrangements for its multi-burner models.
Turning off the outer burners is one possible arrangement, not a way to guarantee equal heat across the whole plate. Follow your model’s instructions and use the area that suits the food. A single-control electric griddle does not have this same burner setup.
How to Cook Grilled Cheese Sandwiches on A Griddle?
The following sequence describes a simple bread-and-cheese sandwich. Use a recipe that suits your bread and cheese, and follow its instructions for any extra fillings.
1. Coat the Cooking Faces of the Bread
Softened butter is one option for the outside faces that will touch the griddle. Spread it in a thin, even layer rather than treating it as something that holds the sandwich together.
Some recipes add butter or oil to the cooking surface instead. For example, Blackstone’s Grilled Cheese 3 Ways uses a little butter or oil on the plate. Follow a method that suits your surface; the two approaches are not guaranteed to give identical results.
2. Build the Sandwich

You can build the sandwich on the griddle, as Sargento’s classic recipe does. Place the first bread slice with its buttered face down, add the cheese, then put the second slice on top with its buttered face up.
Use a cheese intended to melt in the recipe, such as cheddar, Swiss, or Monterey Jack. Thin slices or evenly distributed shredded cheese can help you avoid a thick pile in the center. The amount should suit the size of the bread and the recipe.
If you add other fillings, use ready-to-eat or appropriately precooked ingredients and a clean preparation surface. Toasted bread and melted cheese cannot show whether raw meat or other raw animal ingredients have been safely cooked.
3. Check the Underside Before Turning
Let the first side cook, then gently lift an edge with a spatula that is suitable for your griddle. Turn the sandwich when the underside has browned as your recipe describes.
If the bread is browning too quickly while the cheese is still firm, reduce the heat. The time depends on the bread, amount of filling, cooking surface, and starting temperature; there is no fixed number of minutes that suits every sandwich.
4. Check the Bread and Cheese Together
Cook the second side until the bread is browned and the chosen cheese has melted as intended. Different cheeses behave differently when heated, so do not expect every variety to become equally stretchy or liquid.
For a plain bread-and-cheese sandwich, these are useful texture checks. They are not a food-safety test for additional raw ingredients. FDA food-handling guidance explains that color and texture cannot establish whether meat, poultry, seafood, or eggs are safely cooked.
Lift the sandwich onto a suitable board or plate before cutting it. Let it cool slightly before eating, since melted cheese can be very hot.
An Alternative Way to Make a Grilled Cheese Sandwich on The Griddle
You can also assemble the sandwich on a clean board before it goes on the griddle. That choice does not require a cold start: a prepared sandwich can go onto the surface once your appliance and recipe say it is ready.
1. Make the Sandwich
Follow these steps to make your sandwich:
- Lay out a piece of bread.
- Add sliced cheese that suits your recipe, such as cheddar or Swiss.
- If you are using shredded or grated cheese, place enough to cover the entire surface of the bread.
- Add any ready-to-eat or appropriately precooked fillings that your recipe calls for.
- Close the sandwich by adding the second slice of bread.
2. Choose a Suitable Preheated or Cold-Start Method
For a preheated method, coat the sandwich’s outside faces as your recipe directs, then place it on the ready cooking surface. Follow the appliance’s rules for added fat and utensils.
A cold start is an option for some stovetop-pan recipes. King Arthur’s thick-bread grilled cheese method starts in a cold, sturdy pan such as cast iron over medium-low heat. It does not establish a cold-start rule for every electric or gas griddle.
Choose one complete method. Do not take a cold-start instruction from one recipe and combine it with the heat setting or timing from another.
3. Wait for The Slices to Brown
As the cooking surface and sandwich heat, check the underside occasionally by lifting an edge with a suitable spatula. Browning will take time, especially when the method starts from cold.
Turn the sandwich when the first side is browned as your recipe directs. If the outside is coloring faster than the cheese is melting, adjust the heat rather than assuming that more browning means the whole sandwich is ready.
4. Flip the Sandwich Over
Cook the second side and continue checking both the bread and filling. The 2–3-minute-per-side timing in the linked Blackstone recipe belongs to that preheated method; it is not a timing rule for every sandwich or for a cold start.
Use the recipe’s timing as a guide and watch the result. Do not assume that all cheese will melt or stick to both slices within the same number of minutes.
Related Read: Ideal French Toast Griddle Temp | Ideal Bacon Griddle Temp
5. Take It Off the Griddle
When the bread and cheese are ready, lift the sandwich off the griddle onto a suitable board or plate. Let it cool slightly, then cut it into halves if you like.
A short cooling pause can make it easier to handle, but a fixed one-minute wait does not guarantee that the filling will be comfortable to eat.
